Human Support Mode and Email Configuration for your SmartiePal AI assistant (step-by-step tutorial)
25 October 2025In the previous tutorial, you learned how to create operators and integrate them with your assistants through the integration tab and the operator console. Today, we’re going deeper into human support mode and email configuration.
By the end of this tutorial, you’ll know how to:
- Schedule when SmartiePal answers as AI and when a human takes over
- Customize the messages users see while in human mode (including offline states)
- Enable email sending and receiving for your human operators via SMTP and IMAP
Understanding the Scheduler
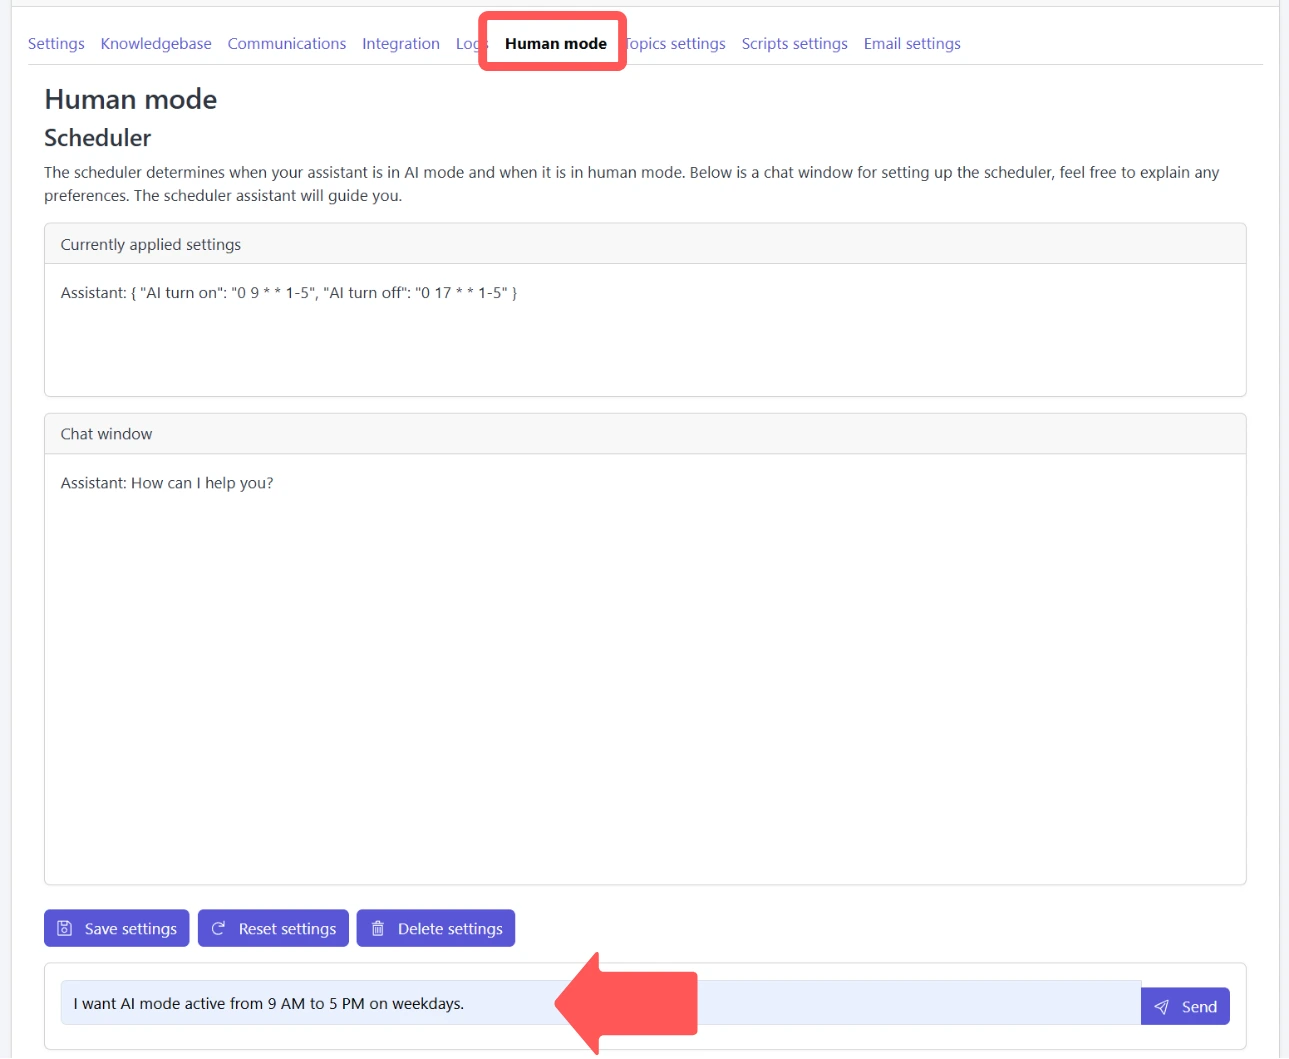
Let’s start in the Human mode tab of your assistant’s settings. The first feature you’ll see is the Scheduler. This controls when your assistant runs in AI mode and when it switches to human mode. You can automate these transitions based on your team’s availability.
Step 1: Access the Scheduler
The scheduler is conversational. You literally talk to it.
In the chat window, you can say things like:
“I want AI mode active from 9 a.m. to 5 p.m. on weekdays.”
“Switch to human mode every day at 6 p.m.”
This natural language instruction becomes the base for automated coverage rules.
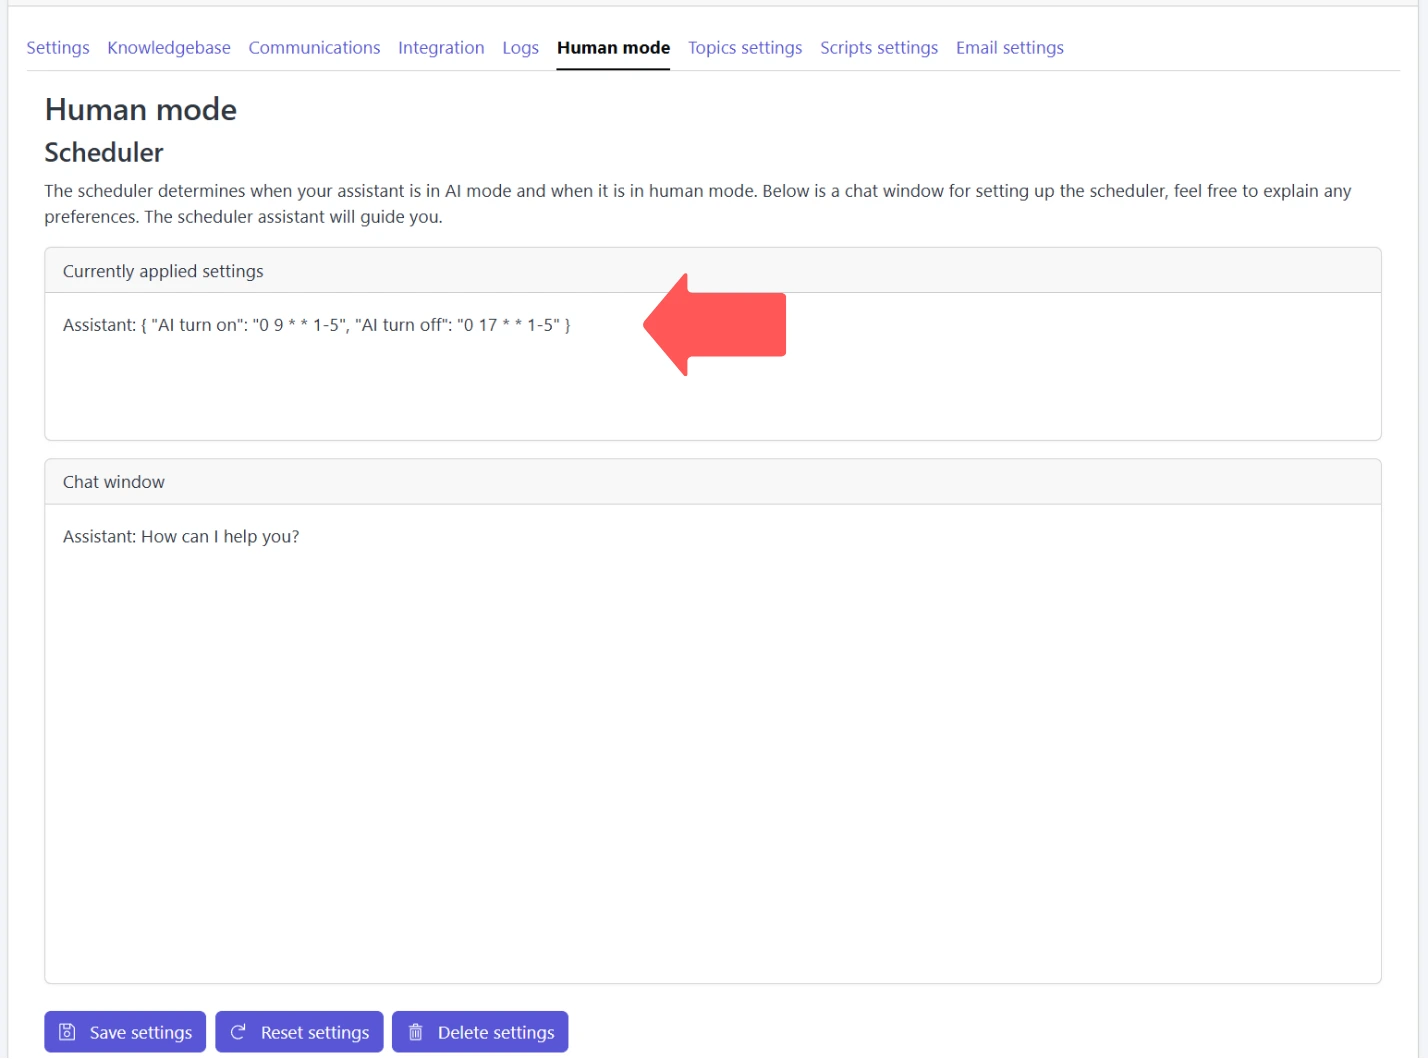
Step 2: Review the Schedule
After you describe your preferred schedule, the scheduler assistant translates it into a structured schedule. You’ll see those generated rules displayed above the chat window in a technical format.
You don’t need to understand that syntax. The assistant handles the complexity; you just confirm that the behavior matches what you want.
Configuring Behavior Settings
Right under the scheduler, you’ll find Behavior settings. This is what end users will actually see when they talk to your assistant in human mode.
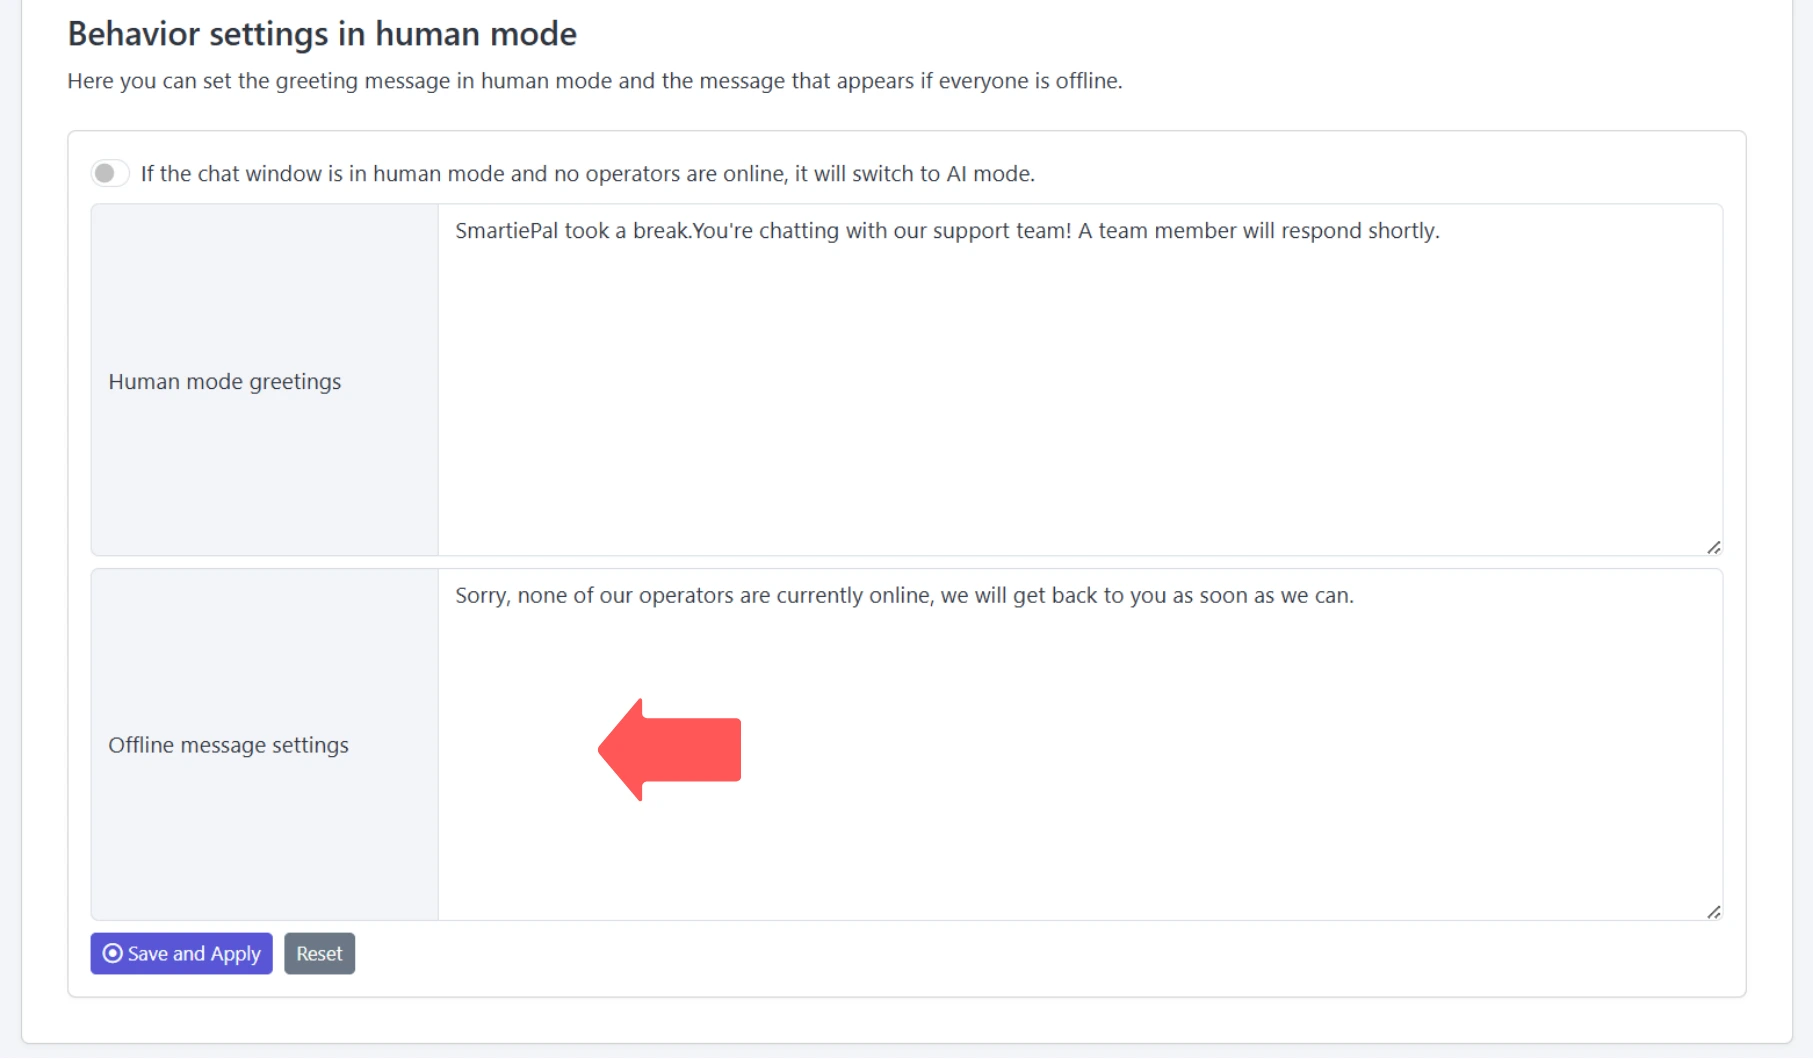
Step 3: Configure the Human Mode Greeting
The Human mode greeting is shown when a user starts a conversation while your assistant is in human mode.
Example greeting:
“SmartiePal took a break. You are chatting with our support team. A team member will respond shortly.”
You can fully customize this message to match your tone of voice.
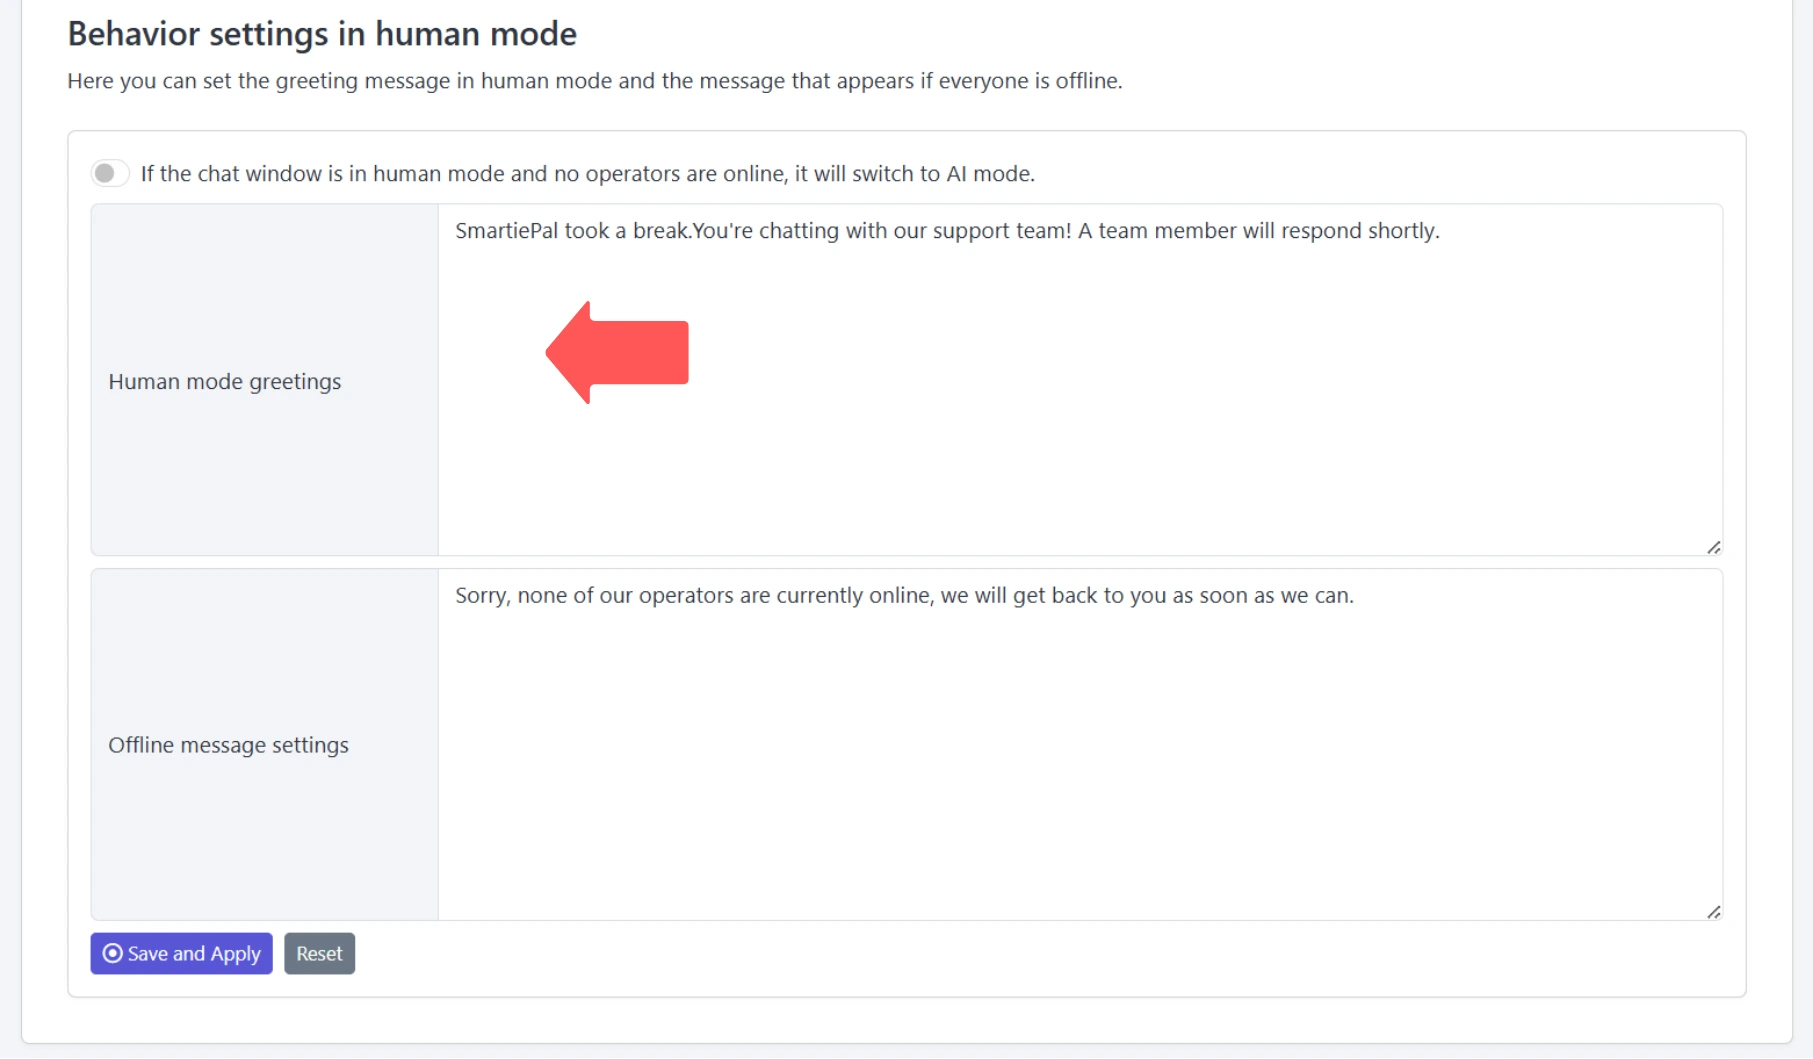
Step 4: Set Up the Offline Message
The Offline message appears when you are in human mode but currently no operators are online.
The default message might say:
“Sorry, none of our operators are online. We will answer you as soon as we can.”
You can adapt this to include expected response times or escalation info.
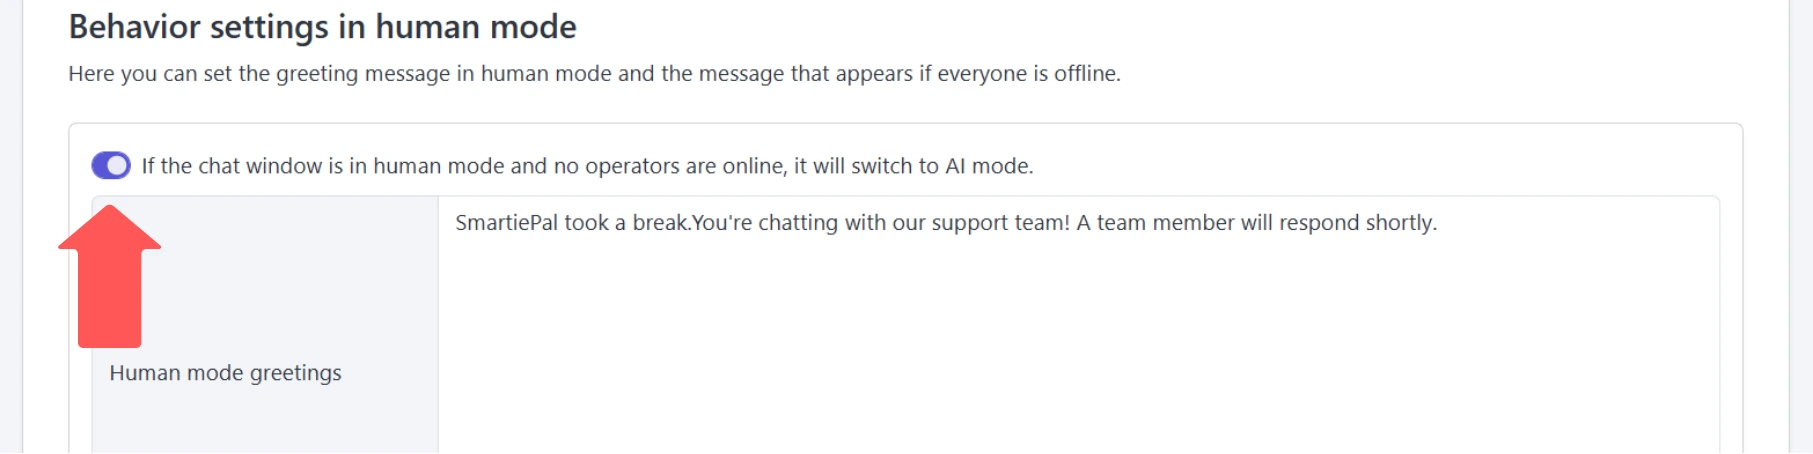
Step 5: Configure Automatic AI Fallback (Optional)
What happens if the chat is in human mode but nobody from the team is available to answer right now?
You can enable an automatic AI fallback. With this enabled, the system temporarily switches back to AI mode, so the user still gets help instead of waiting for a human who isn’t there.
If you prefer strict “humans only,” you can turn this fallback off.
Testing the Configuration
Now let’s see how this looks from the user’s perspective in a live assistant window.
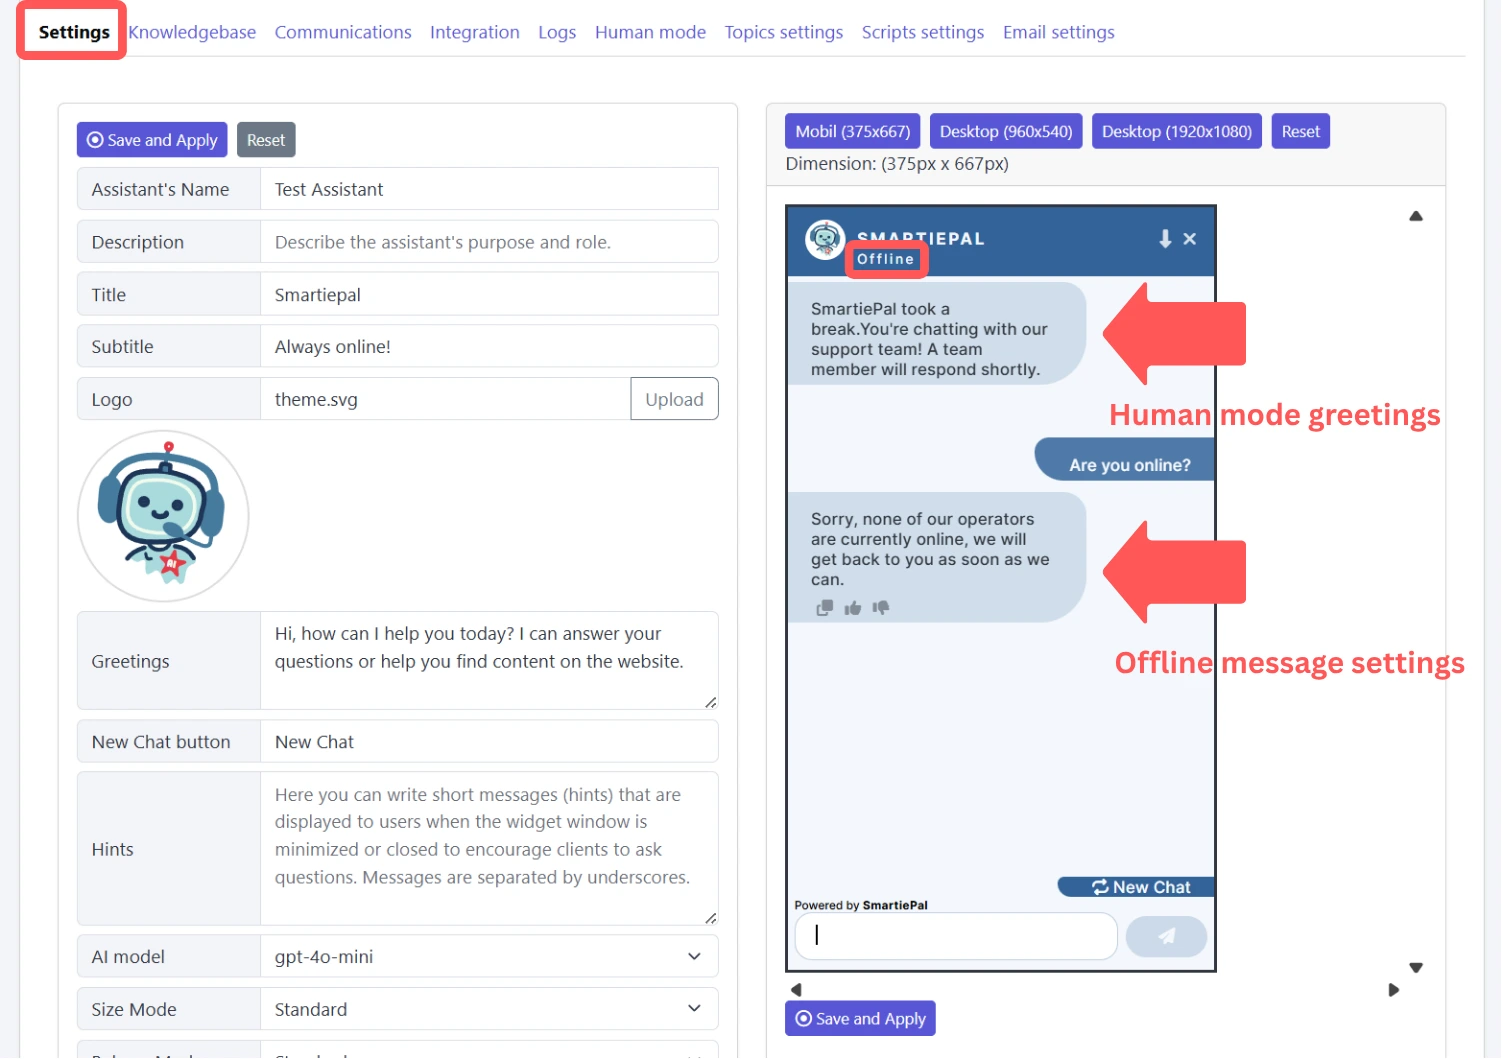
Step 6: View the Status Indicator
Under the assistant’s title, users see a status indicator. If you’re in human mode and no one is available, it will show offline.
This gives users immediate clarity about whether a human will answer in real time.
Step 7: Test the Offline Message
Try asking the assistant a question while in this “offline human mode” state. The reply you’ll see is exactly the offline message you configured earlier.
This sets expectations and prevents frustration, because the user understands what will happen next.
Exclusive Human Mode Operation
You’re not required to use AI at all.
If you want operators to handle 100% of conversations manually, you can configure your assistant to run in exclusive human mode with no AI fallback. In that setup, SmartiePal basically becomes a pure live support console for your team.
Configuring Email Settings
Now let’s move to the Email settings tab. This is what powers email replies from your operators.
In SmartiePal, when a user shares their email address, an operator can reply to them by email directly from the platform. For that to work, you’ll connect your own mailboxes here.
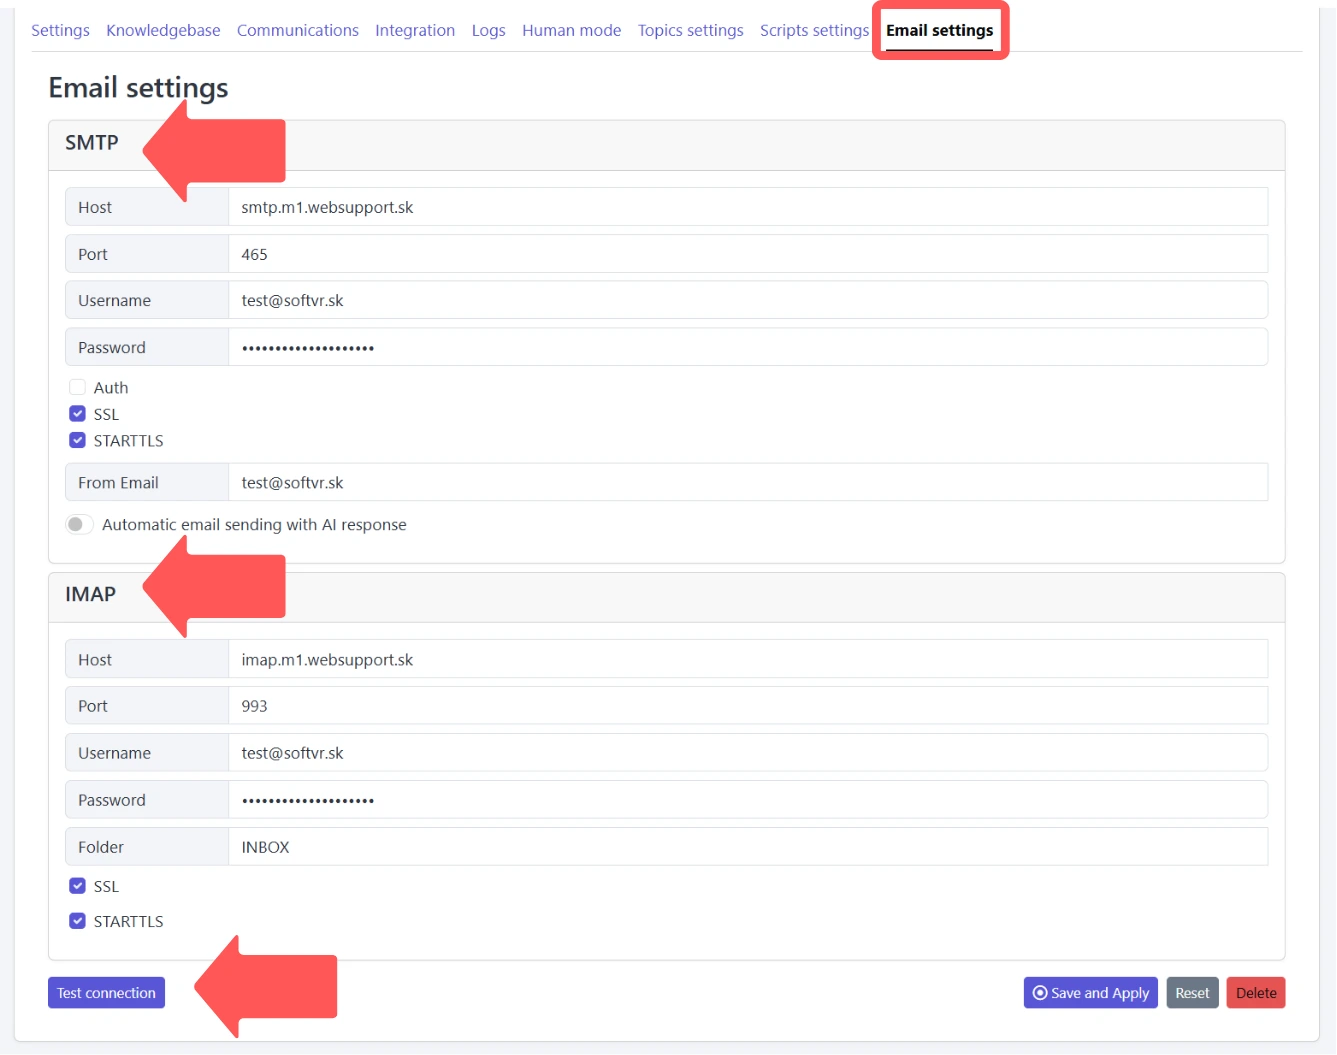
Step 8: Understanding SMTP and IMAP
The Email settings tab has two parts:
- SMTP – outgoing mail (sending replies to the user)
- IMAP – incoming mail (receiving replies back from the user)
You’ll configure both so your operators can run full two-way email support without leaving SmartiePal.
Step 9: Configure SMTP for Sending Emails
Under SMTP, you’ll enter:
- Outgoing mail server host
- Port number
- Username and password
- Security mode (SSL / TLS)
- From address that users will see in their inbox
There’s also an optional setting for automatic email address sending with AI response, which can streamline workflows where the AI drafts the message but you still want it to be delivered via email.
Step 10: Configure IMAP for Receiving Emails
For incoming messages, you’ll configure IMAP.
You’ll provide:
- Incoming mail server host
- Port
- Username and password
- Folder to monitor (usually Inbox)
Just like SMTP, IMAP also uses secure options such as SSL/TLS.
Once this is set, SmartiePal can surface user replies back to the operator inside the platform.
Step 11: Test and Save Your Email Configuration
After entering your SMTP and IMAP details, use the Test connection button. This runs a quick verification to confirm SmartiePal can log in and send/receive using your settings.
If the test succeeds, just click Save. From this point on, your operators can reply to users via email, directly from inside SmartiePal — no context switching to another inbox.
Summary
Here’s what you’ve set up:
- Automated scheduling that decides when SmartiePal responds as AI and when a human takes over, based on your availability.
- Behavior settings that define what users see in human mode: greeting text, offline messaging, and status indicators.
- AI fallback for when no operator is available — or, if you choose, a fully human-only workflow.
- Email support via SMTP (sending) and IMAP (receiving), so operators can handle conversations by email directly inside SmartiePal.
Together, these features let you control exactly how and when your assistant blends AI automation with real human service — so users always get the right level of help.
In the next tutorial, we’ll explore topic settings and scripts: tools that shape how your assistant answers and let you design specialized behaviors for different conversation scenarios.
Ready to configure your own human support? Sign up and implement these settings today.