Create your first SmartiePal AI assistant (step-by-step tutorial)
12 September 2025In this hands-on guide, you’ll learn how to register, sign in, create your very first AI assistant, preview it, and embed it on your website—exactly as shown in the introductory SmartiePal tutorial video. Follow the steps below and you’ll have a working assistant in minutes.

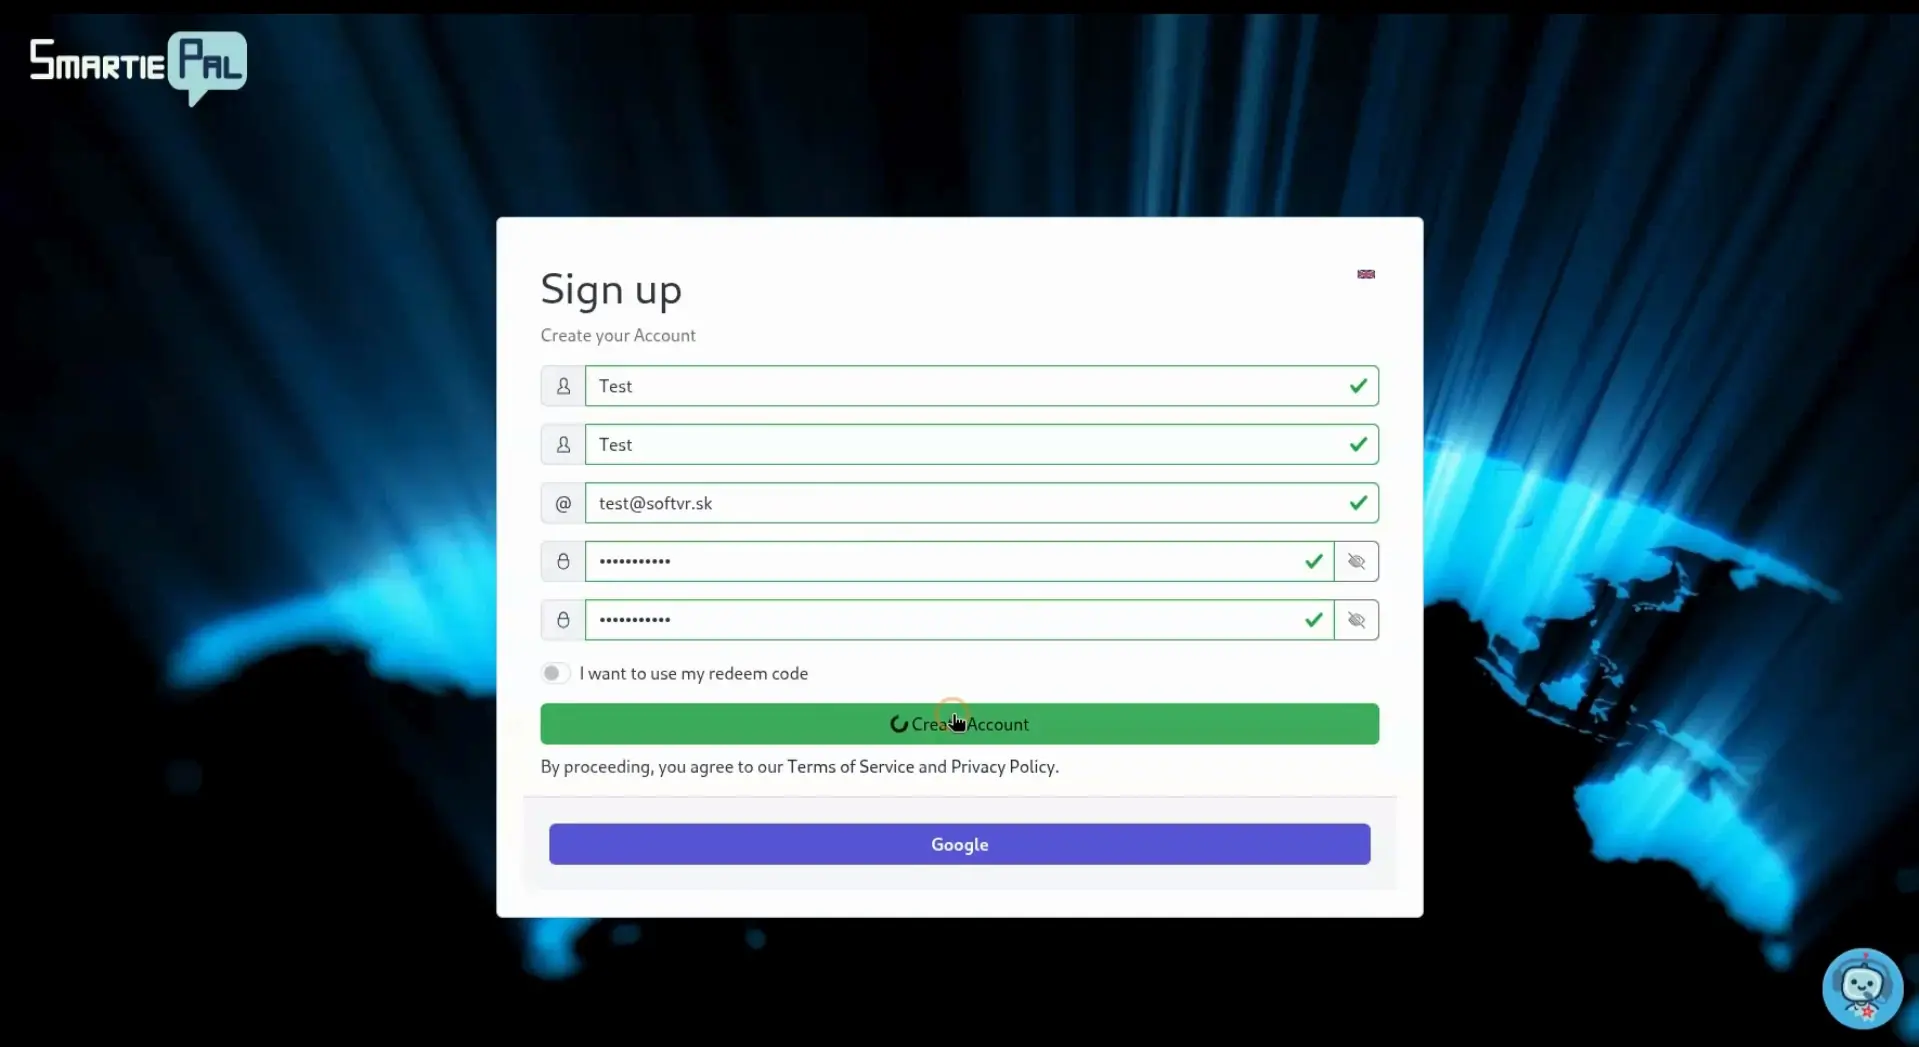
Step 1: Register a new account
- Go to www.smartiepal.com and open the Sign up form.
- Fill in your basic details (name, email) and create a secure password.
- Click Create account to finalize your registration.
After creating the account, you’ll be redirected to the login screen.
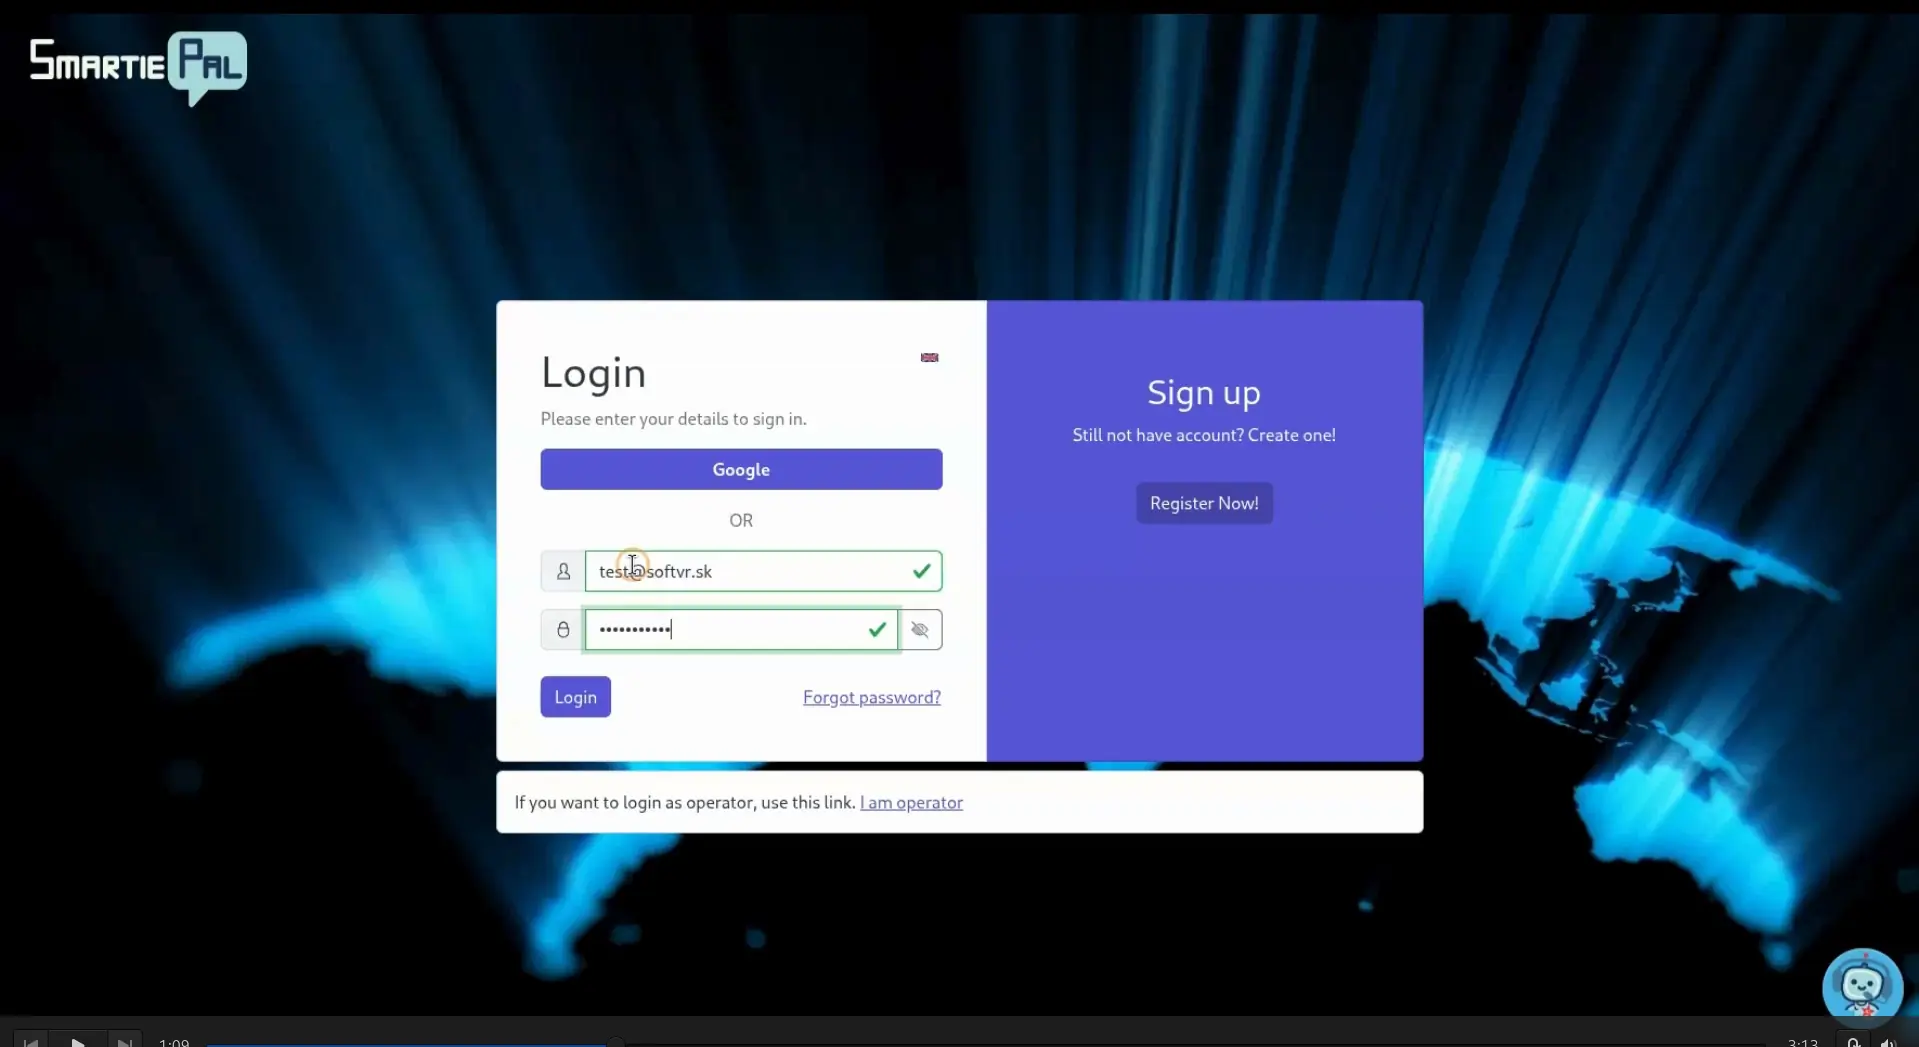
Step 2: Sign in for the first time
- Enter your credentials on the login page to access the SmartiePal administrator console.
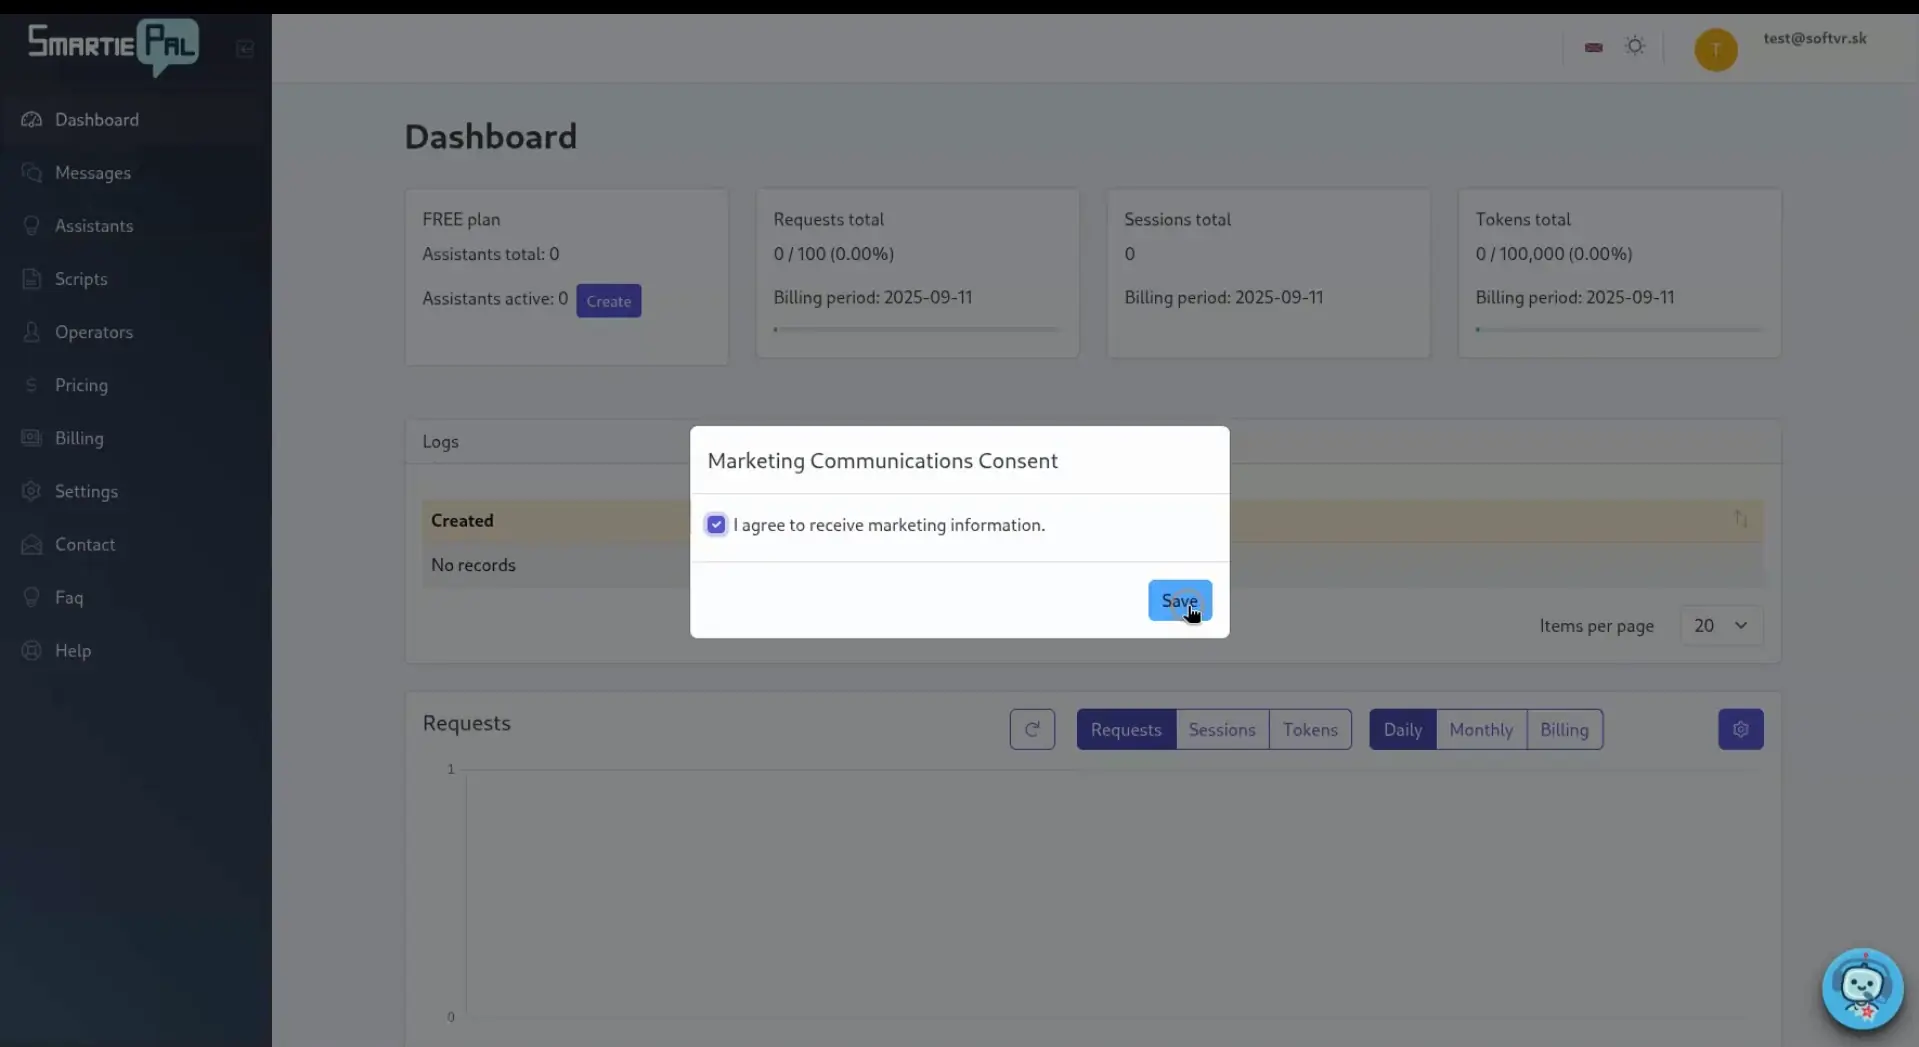
- On first login, you’ll be asked for marketing consent. This step is optional and won’t appear again on future logins.
Step 3: Explore the Dashboard
You’ll land on the Dashboard—a central overview with charts and graphs that track your assistants’ activity. Since this is a fresh account, the dashboard will be empty until you create your first assistant.
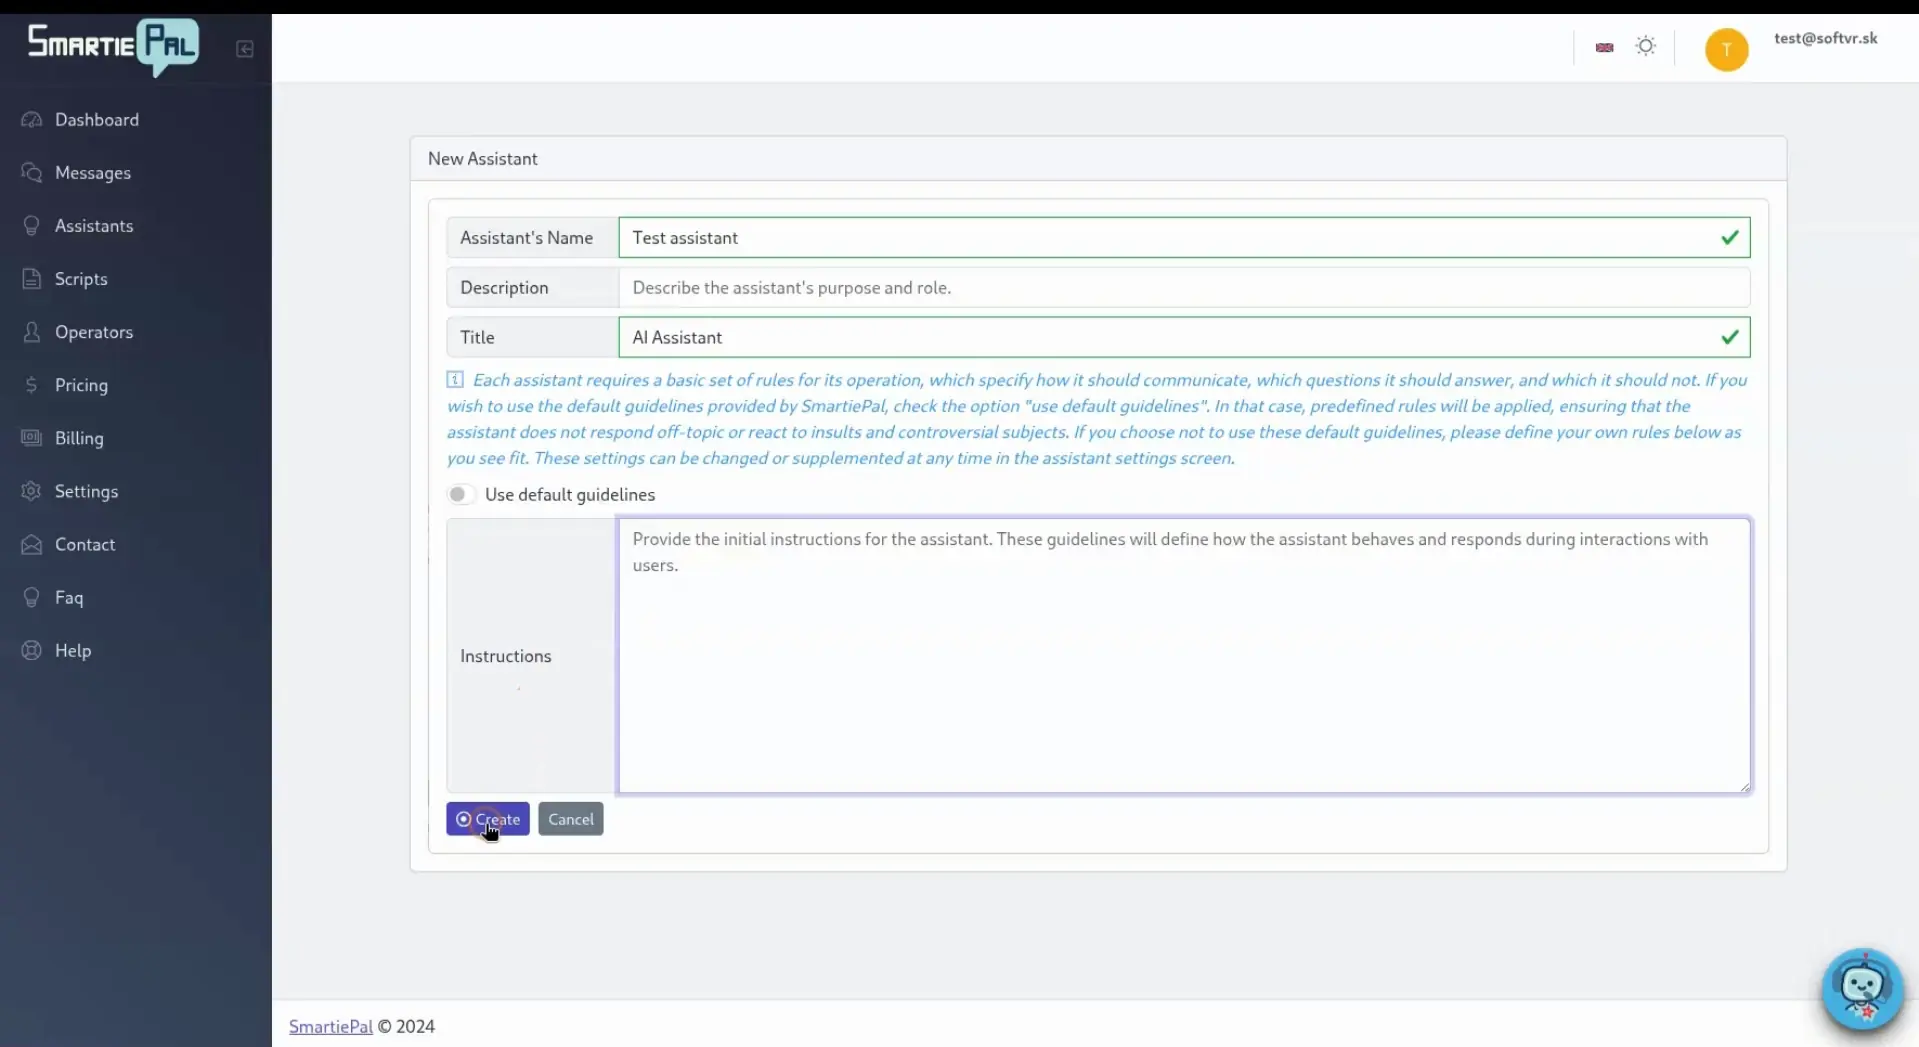
Step 4: Create a new assistant
- Click the Create button.
- Fill in the Assistant Name. This is for internal use only to help you stay organized.
- Enter the Title. This is the main heading users will see in the widget on your site.
- (Optional) Add Initial instructions to guide your assistant’s behavior. You can edit these later. If left blank, the assistant will answer questions to the best of its ability.
- Save. Your new assistant will appear under the Assistants tab.
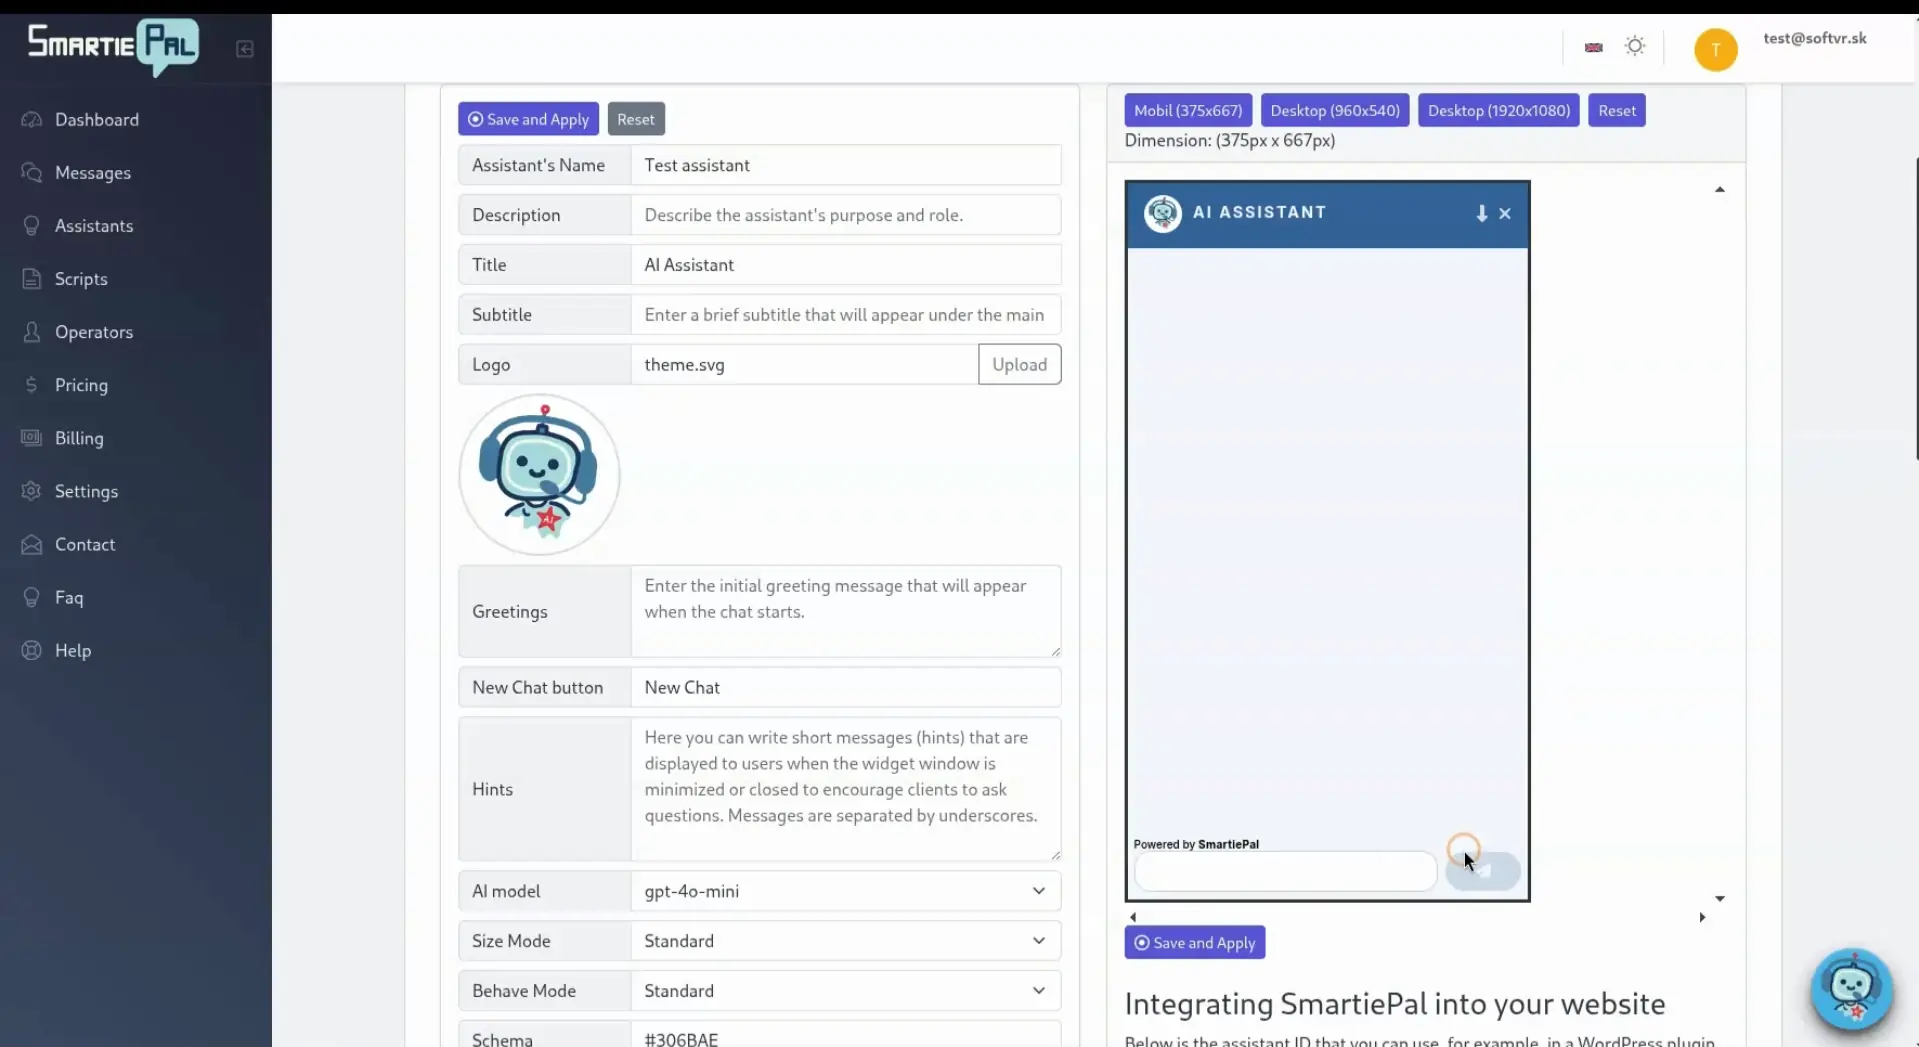
Step 5: Configure and preview
Open the assistant’s detail view to access all configuration options. On the right, you’ll see a live preview of the website widget. By default, it appears as a small button; clicking it opens the full chat window.
Step 6: Test the conversation
- Click the widget button in the preview.
- Type a question and press send.
- The assistant will respond instantly, just like it will for your visitors.
If you want a different tone or behavior, tweak the Initial instructions and test again.

Step 7: Embed the assistant on your website
- In the assistant details, locate the provided source code snippet (embed code).
- Click Copy to send the code to your clipboard.
- Paste it into your site’s HTML (ideally right before the closing
</body>tag).
Once deployed, the assistant will be visible and fully functional on your website.
Ready to try it live? Sign up and set up your first SmartiePal assistant today.