Customize your SmartiePal AI assistant's design and behavior (step-by-step tutorial)
22 September 2025In this follow-up tutorial, you'll learn how to customize your SmartiePal assistant's appearance and basic functionality. Now that your assistant is up and running, you can personalize its design, communication style, and behavior to perfectly match your website and brand. Follow these steps to fine-tune your assistant before—or after—deployment.

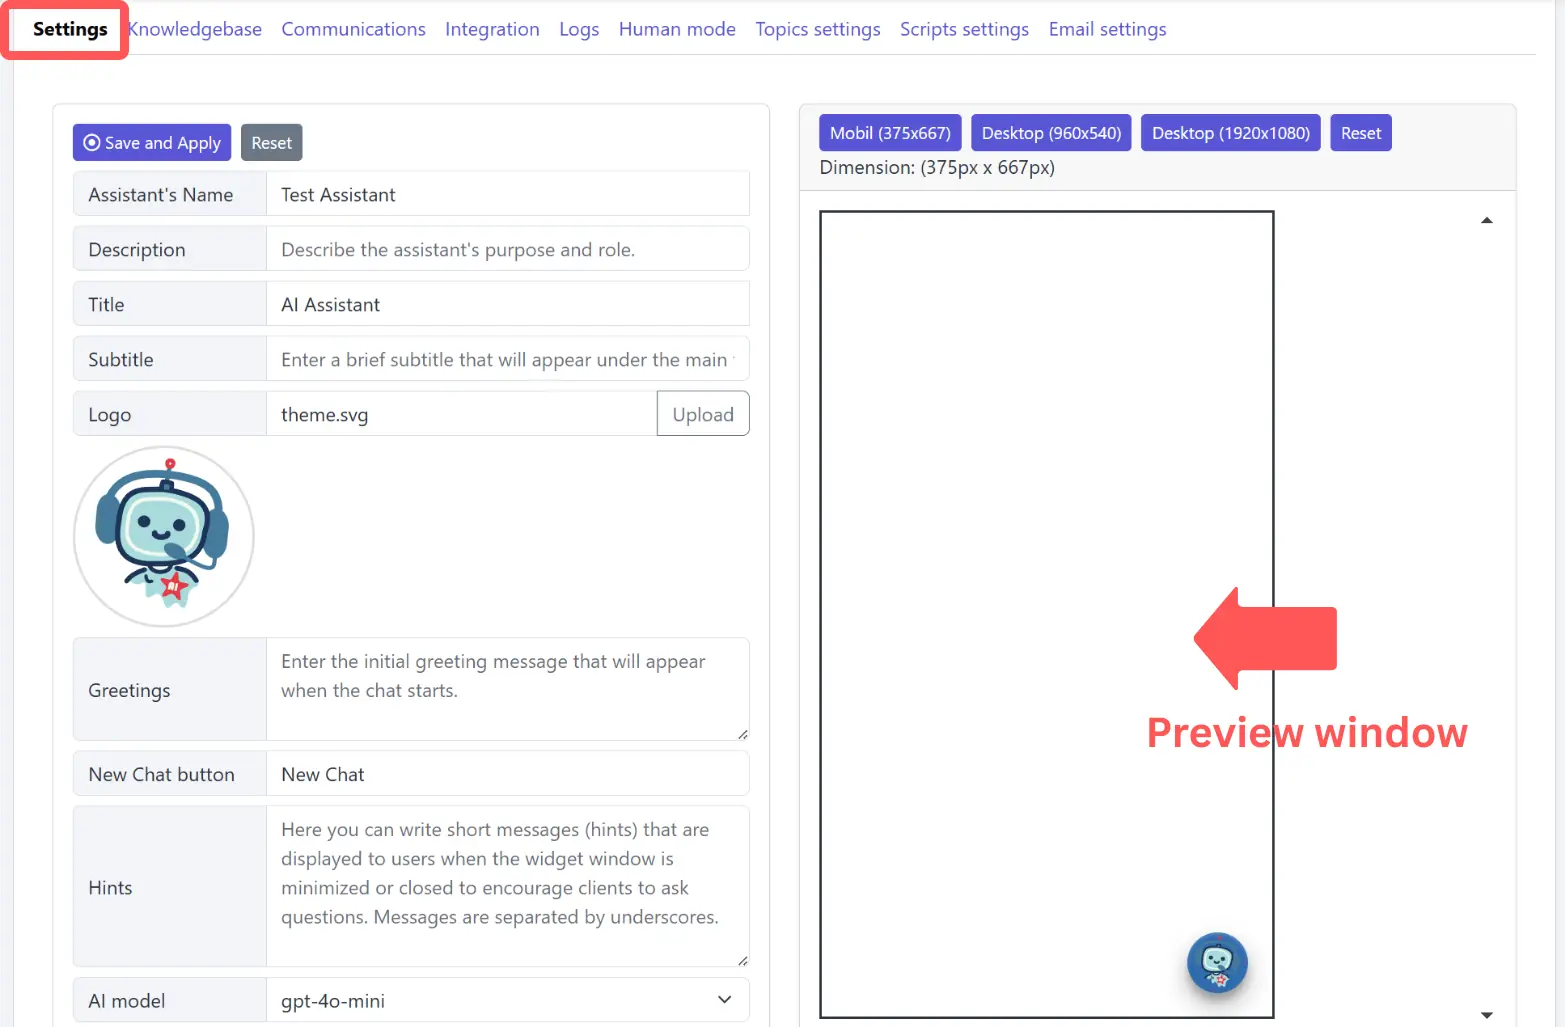
Step 1: Access the Settings Section
- Log into your SmartiePal Administrator console and navigate to your assistant.
- Open the Settings section where you can customize functionality and appearance.
- Notice the live preview window on the right—every change you make will be instantly reflected here.
This preview allows you to fine-tune your assistant before deployment, though changes can also be applied to already deployed assistants.
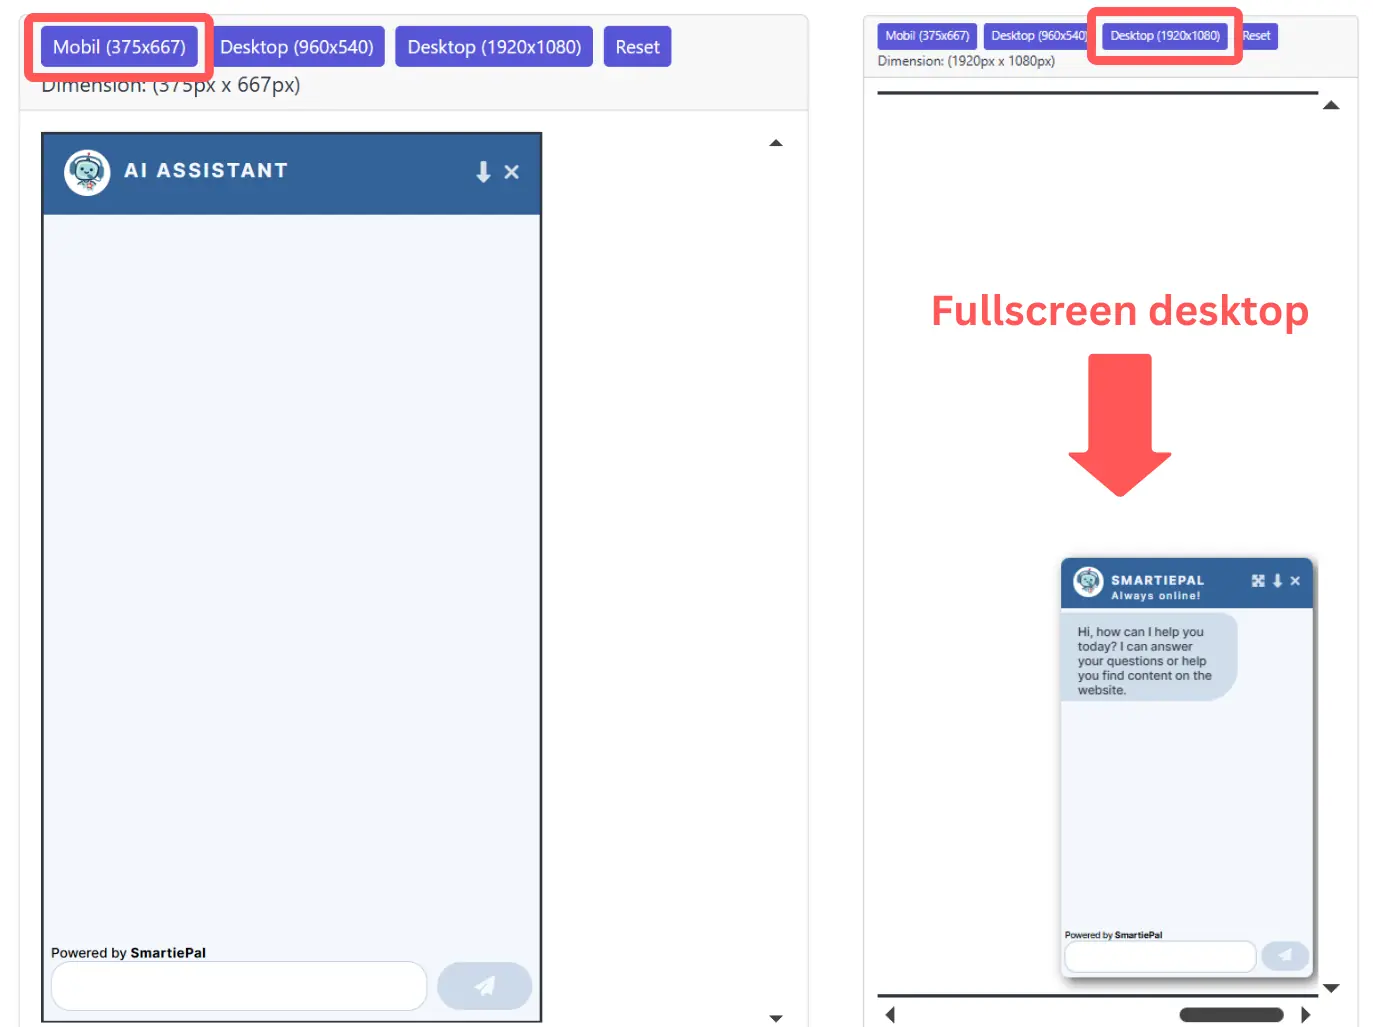
Step 2: Choose Your Display Format
- By default, you'll see the mobile version of your assistant in the preview.
- Switch between mobile, tablet, and desktop views to see how the chat design adapts to different screen sizes.
- For this tutorial, we'll focus on the mobile view to demonstrate the core customization options.
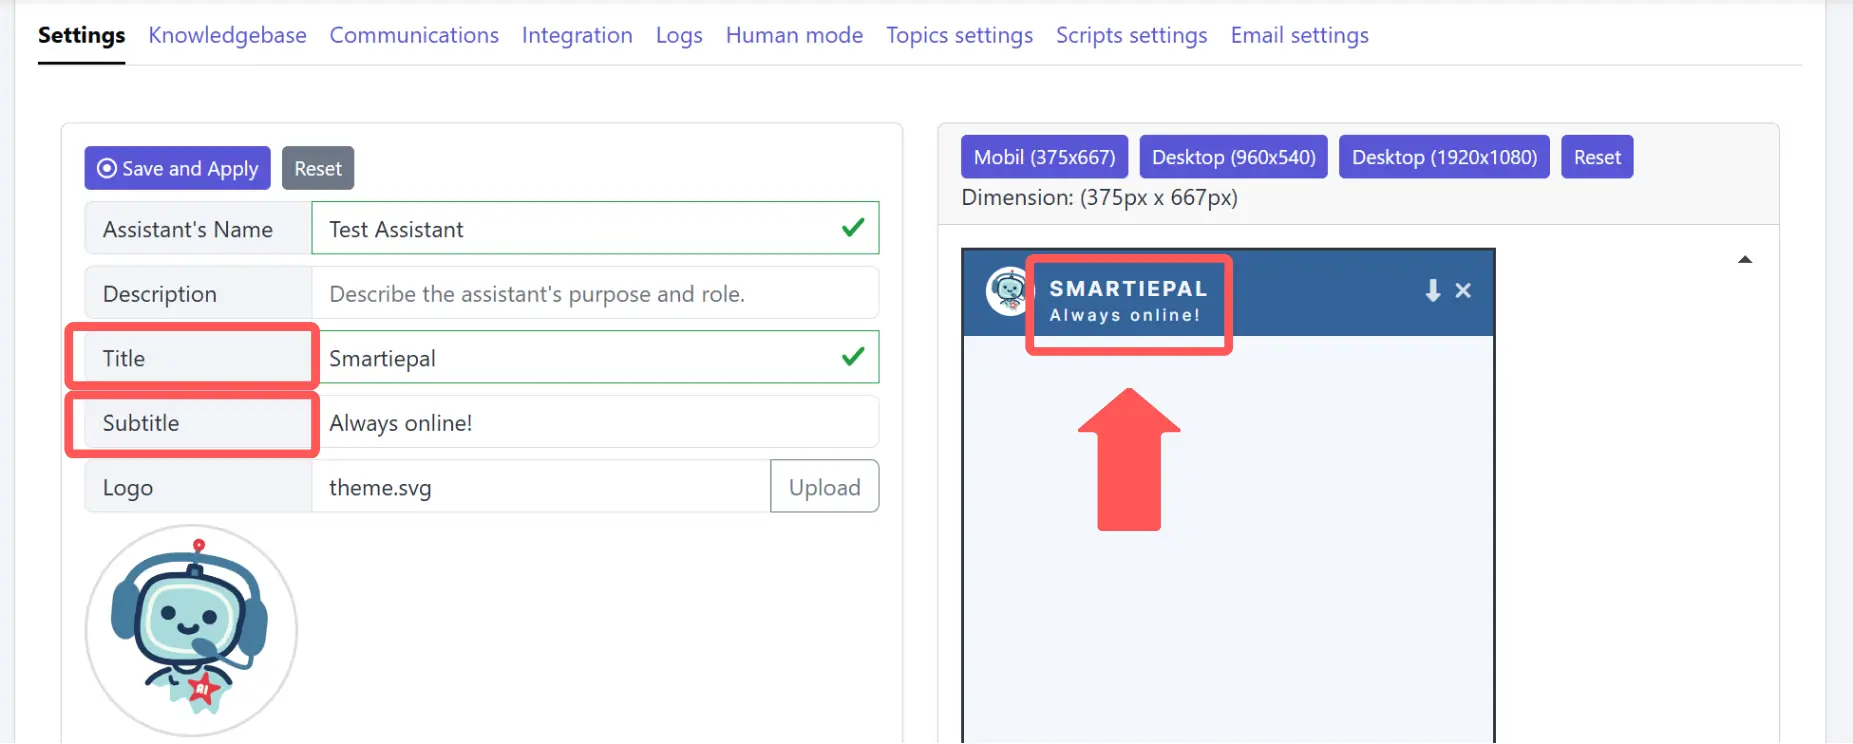
Step 3: Customize Your Assistant's Identity
- Start by giving your assistant a personalized name that fits your website's purpose.
- Add a subtitle or catchphrase to give your assistant more personality and encourage user engagement.
- Consider your industry: a library might use "AI Librarian," while an art supply store could choose "ArtBot" with the subtitle "Art Advice in Your Pocket."
A customized name and subtitle make your assistant feel more personal and approachable to visitors.
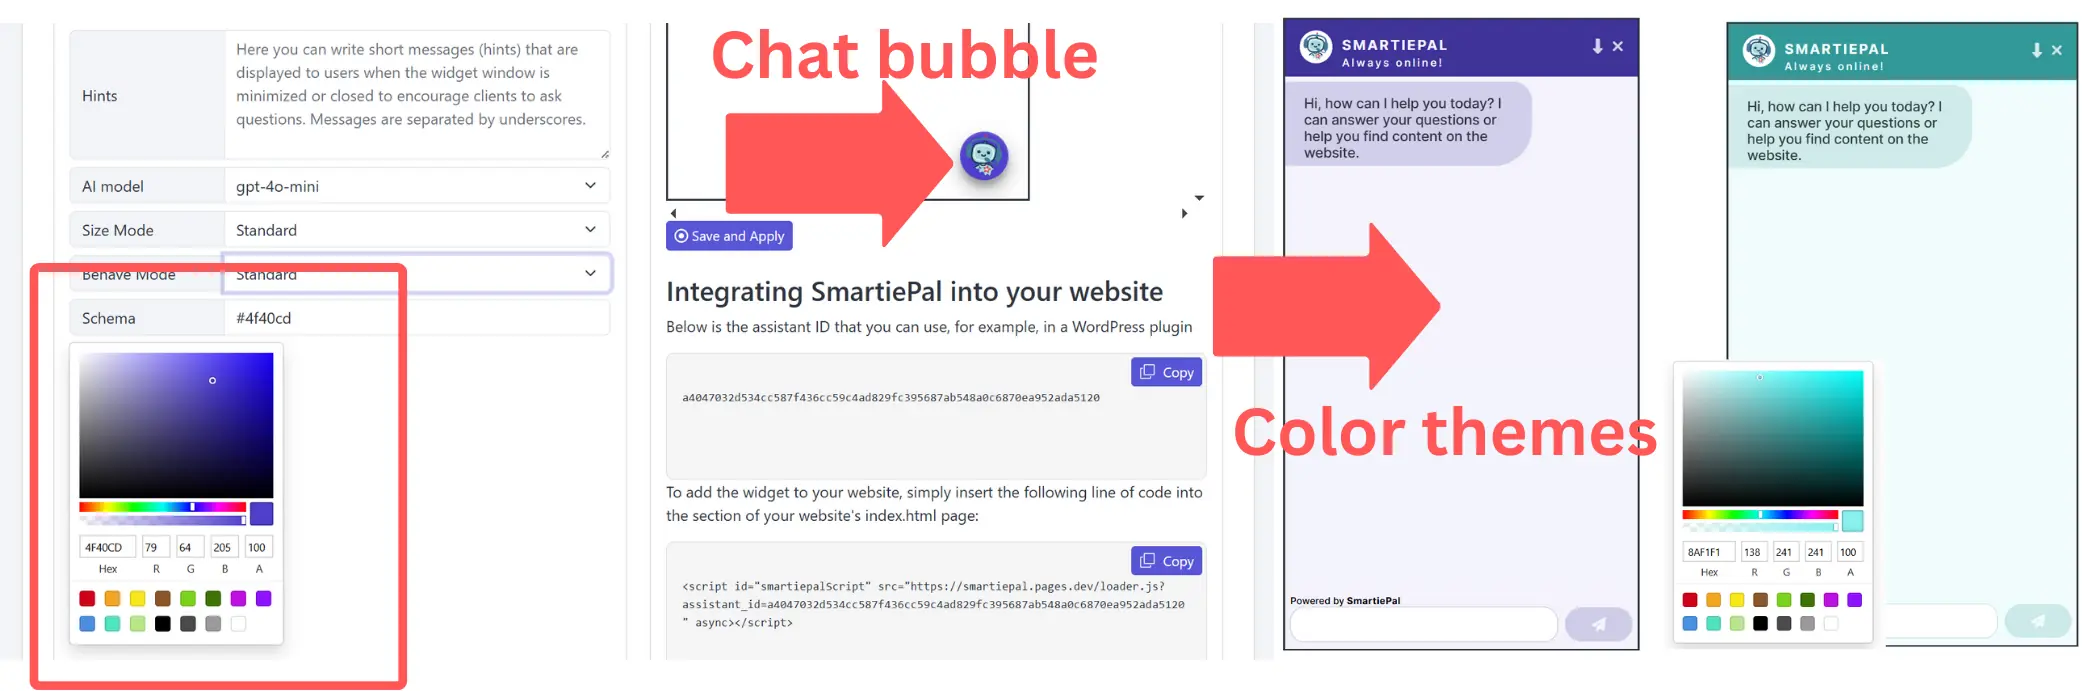
Step 4: Upload a Custom Icon
- Replace the default icon with your website logo or custom design.
- Upload an SVG file for the best quality and scalability.
- This icon will appear both in the chat bubble and next to your assistant's title in the chat window.
While the default icon is designed to be friendly and approachable, using your own branding creates better visual consistency with your site.
Step 5: Configure Communication Settings
- Customize the initial greeting to reflect how users can best leverage your assistant.
- Select the appropriate GPT model version for your needs (check your pricing plan's question limits as more complex models may have lower limits).
- Write greetings that guide users toward the most helpful interactions with your assistant.

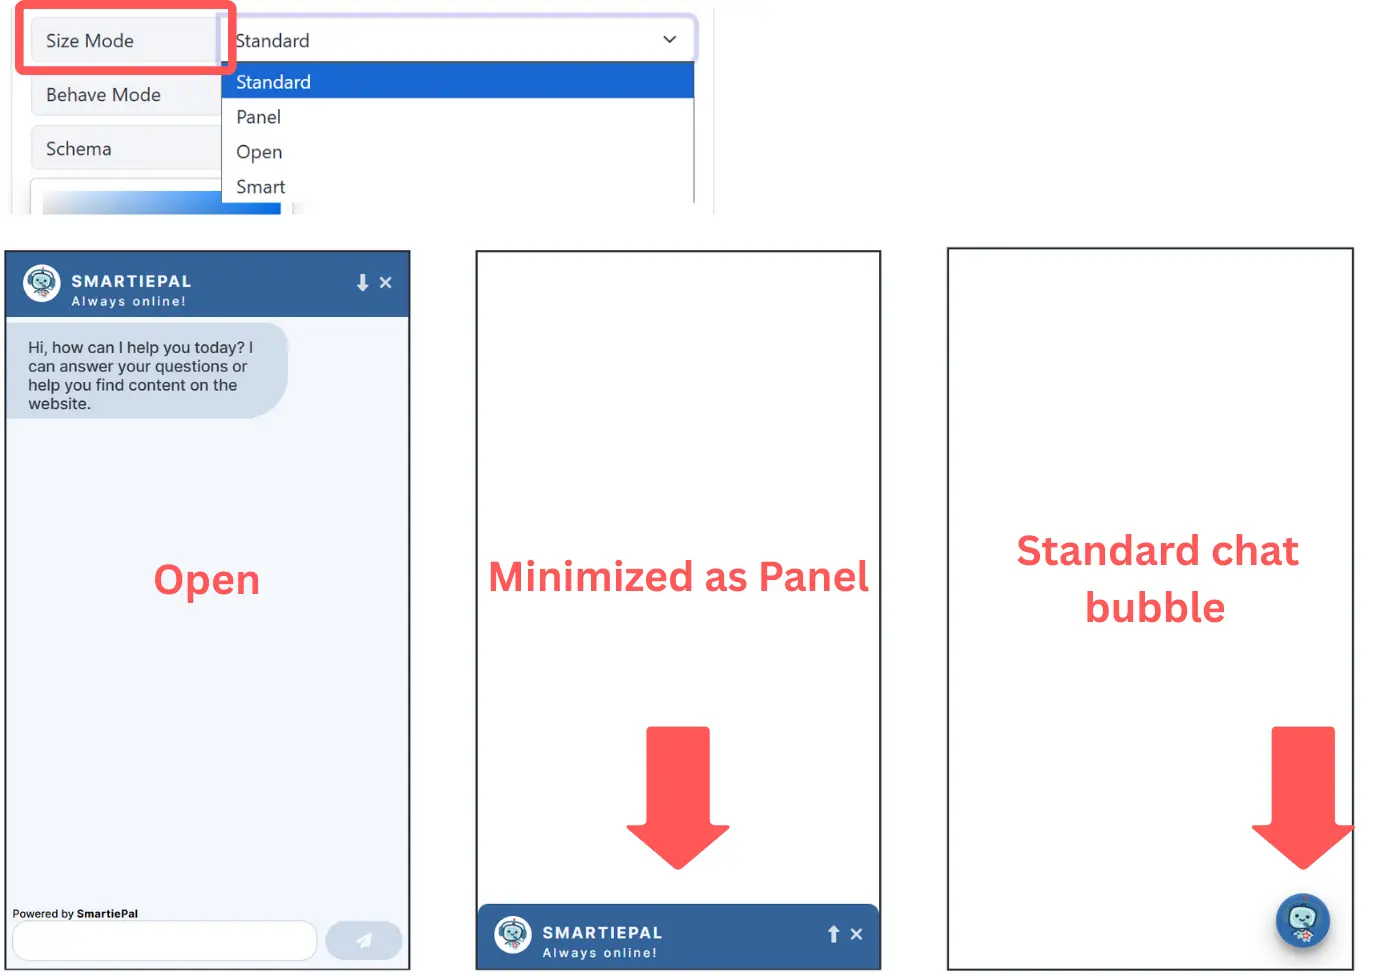
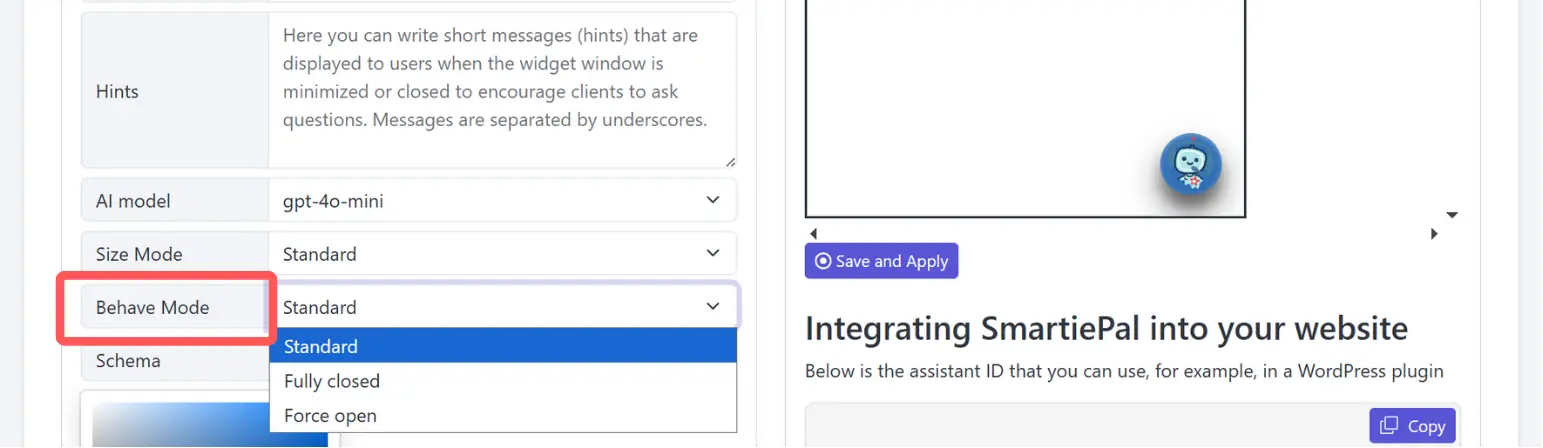
Step 6: Set Display and Behavior Options
- Choose how your assistant appears when your site first loads: fully opened, minimized panel, or chat bubble only.
- Configure the closing behavior: select "fully closed" if you want the assistant to disappear completely when users close it.
- Choose "standard" behavior to keep the chat bubble visible even after closing the chat window.
These settings help you balance user engagement with a non-intrusive experience.
Step 7: Customize the Color Theme
- Select a main color that matches your website's design.
- SmartiePal will automatically generate a full color scheme based on your chosen primary color.
- Preview the color changes in real-time to ensure they complement your site's overall aesthetic.
For highly detailed design customization beyond the standard options, contact the SmartiePal team for additional support.
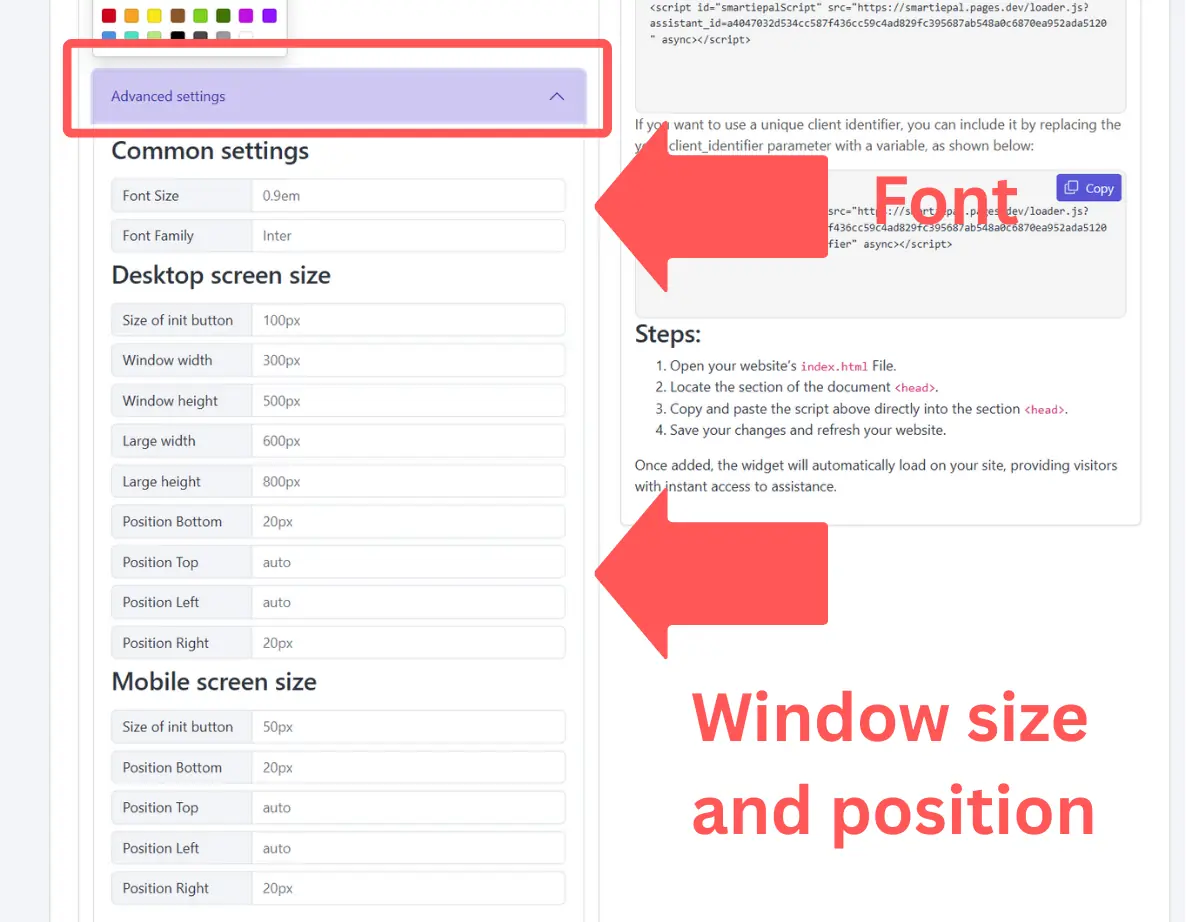
Step 8: Fine-tune Advanced Settings
- Access the Advanced Settings section for detailed customization options.
- Adjust chat text size and font to match your site's typography.
- Configure chat window sizing and positioning for both desktop and mobile displays.
These advanced options give you precise control over how the assistant integrates with your website's layout and design.
Your SmartiePal assistant is now fully customized to match your brand and website design. In the next tutorial, we'll explore how to protect your assistant from bots using reCAPTCHA and how to set detailed instructions to guide your assistant's responses and behavior.
Ready to start customizing? Sign up and personalize your SmartiePal assistant today.